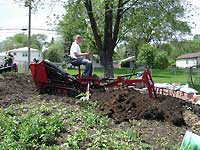
| A Toro backhow was rented to dig the pond, stream, and trenches for piping. Here Dan is have fun with this rented toy while Tim in the background, wanting to run into Dan and knock him off so he can try it out.
| 
|
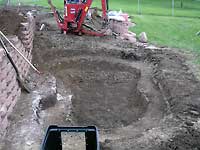
| Next, the main pond was dug using the backhoe and shovels. The depth at its deep end is approx. 28". This image was taken before we lowered the far end another 8" down. We were told by the pond store that this will be deep enough for the fish in the winter as long as we install a heater and circulating pump. The width is 11' and length is 16'. We hit quite a few tree roots during this process.
| 
|
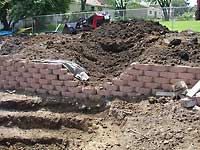
| I left a gap in the retaining wall for the future stream and waterfall. This also gave me a point where I could stagger to top edge of the block by one course. The right side is 4" higher than the left.
| 
|
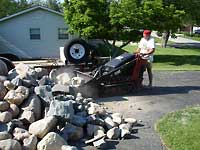
| I used the Toro bucket unit to move the 17 tons of Wisconson Granite, Bluestone, and Limestone to the backyard. This would have taken all summer with a wheel barrow.
| 
|
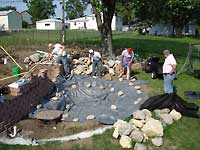
| On June 19th, I had several friends over to help install the pond and stream liner. It was a very hot Saturday, getting up into the mid 90's. We first installed a heavy fabric that goes down prior to the pond liner. This helps to prevent the pond liner from becoming damaged and torn by sharp rocks and roots. Next the liner is laid in, and rocks are put in to hold it in place.
| 
|
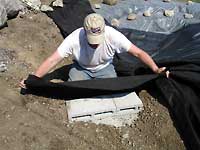
| The waterfalls were built using concrete block sitting on compacted limestone screenings. These blocks had to be placed very level to later support the slate. Once the block was installed, it was covered with a couple of layers of fabric, as so the edges of the block would not wear damge the pond liner.
| 
|
| Once the waterfalls were built, the fabric for the stream was installed and then the pond liner itself. We used one continous piece of pond liner from the top waterfall, all the way to the bottom pond. Where-ever there was a bend in the stream we folded the liner over on itself to make the necessary turn.
| 
|
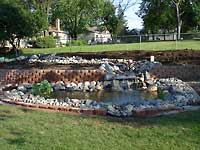
| Once all the rocks were installed, we filled it and put some plants in, and this was what it looked like at the end of the day.
| 
|
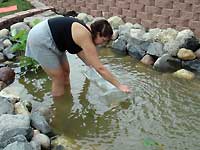
| A week later, Lorrie added 5 Koi fish. They all made it through the summer and about doubled in size from 2" long to 4".
| 
|
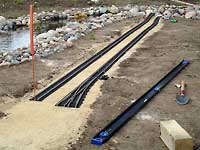
| August 19, 2006 was an exciting day. That was the fist day track was permently laid on roadbed. It involved staking out where the track should be, digging a trench about 4" deep, backfilling with compactable screenings, and then laying the track.
| 
|
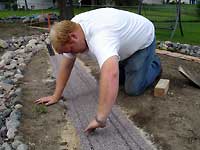
| Once the track was installed, we followed behind with Redstone granite chicken grit for the "decorative" ballast. I chose this for its shape, size, and color, which matches pretty close to the Arizona/New Mexico area of the Santa Fe that I am modeling. Here, Tim is starting to spread it out between the rails. After each rain, I have added a little more due to washout and settling.
| 
|
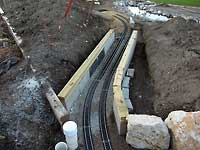
| The first of seven bridges needed to be built this year. I used concrete block with 2 layers of treated 2x4 on top, then installed 2x4 "cross ways", treated plywood, and then a layer of pond liner to keep it dry.
| 
|
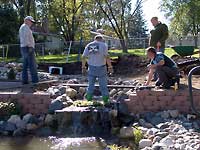
| We installed a temporary bridge over the stream. I was chosen to work in the stream, because no one else wanted to wade in. The two people standing, Dan and Tim, volunteered to weld up the actual bridge that will be placed here someday.
| 
|
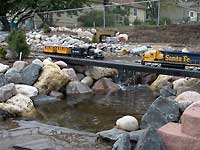
| This is a great shot of a "meet" on the bridge, with 2 Santa fe GE units coming out of the tunnel in the rear.
| 
|
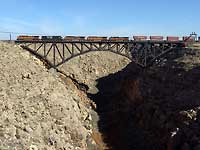
| This is an image of the actual bridge that we are modeling over the stream. This bridge is located in Arizona, approx. 35 miles East of Flagstaff. It is the Canyon Diablo Bridge. It is double track and ballasted. It measures approximately 576' long. Our version will be 8'.
| 
|
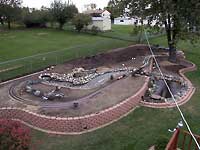
| This image shows our progress at the end of 2006. Not long after this was taken, we "winterized" the pond with a heater, and drained the stream and upper ponds.
| 
|